Twisting Catacombs – Doors

Some time last year I backed Twisting Catacombs Dungeon Scenery by Zealot Miniatures, it arrived earlier this week and it is fantastic quality stuff with great detail and a perfect replacement for Heroquest’s cardboard furniture. So I set aside the Goblins I’m working on and started on some doors.

Twisting Catacombs DoorsI’ve got lots more furniture and scenery work on but for now I’d better get back to the Goblins.

Painting Guide

The doors are very easy to paint I started with an all over black undercoat.

I started on the door frame and base with a heavy drybrush of Cold Grey was first applied so that most of the Black undercoat was covered except in the deepest recesses, I then shaded the model with a mix of Black and Umber Wash. I then drybrushed with Cold Grey, Stonewall Grey and finally Ghost Grey getting lighter with each colour. Because drybrushing leaves a grainy finish I used a very watered down Black Wash (75% water) to smooth out the drybrushing and darken the model a little.

The wooden door was base coated with Heavy Sienna, given a watered down Black Wash then highlighted with Heavy Sienna mixed with Bleached Bone in equal quantities, the final highlight was a mix of 2 parts Heavy Sienna, 1 part Bleached Bone  and 2 parts Gold Yellow.

The metal detailing was base coated with Gunmetal then just given shade with an equal mix of Black Wash and Umber Wash. A few edges were highlighted with Gunmetal again.

To finish I used Army Painter Anti Shine Matt Varnish.

Share

HeroQuest – Elf Hero

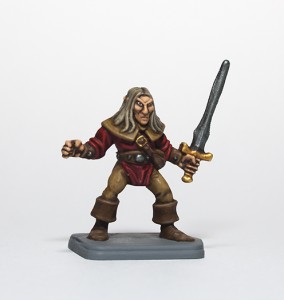
The first of the Heroes are done, I actually enjoyed painting this one which is good because I have quite a large Warhammer 3rd Edition Wood Elf army to paint at some point in the future. I’ve tried to paint the Elf like he appears on the box artwork and I don’t think he’s too far off.

heroquest_elfI think I’ll move on the Goblins now as I’ve bought the Kellar’s Keep expansion again so I have a few to paint.

Painting Guide for the Elf below

The trousers and shoulder thing were painted with Leather Brown, given an Umber Wash highlighted with Leather Brown and then final highlights with Leather Brown mixed with Bleached Bone

The Elfs belt, boots, and pouches were painted with Beasty Brown, then covered with an Umber Wash, followed by another Umber Wash to darken it a little more, then Beasty Brown before a final highlight of Beasty Brown mixed with Bleached Bone. The studs are Gunmetal then a Black Wash and a final highlight of Gunmetal.

I Painted the shirt with a basecoat of Heavy Red, shaded with Black Wash, then worked through the highlights with layers of Gory Red, Scarlett Red and finally Bloody Red.

The sword blade was painted with Gunmetal followed by a Black Wash, I then highlighted the blade with Gunmetal and Chainmail. The pommel and hilt are Glorious Gold followed by Fleshwash, highlighted with Glorious Gold again then finally with Polished Gold on the edges.

The Elfs skin was painted with a basecoat of Dark Flesh, then Dwarf Flesh was added to all but the deepest recesses followed by a Fleshtone Wash. I highlighted with Dwarf Flesh again and then final highlights with Elf Flesh. The Eyes are just Dead White with a dot of Black for the pupil.

The hair is basecoated with Heavy Brown, shaded with Umber Wash, highlighted with Heavy Brown mixed with Bleached Bone and then a final highlight of pure Bleached Bone.

Share

Heroquest – Zombies

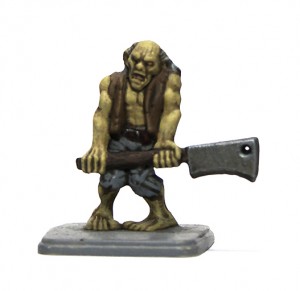
All the Zombies are now finished, very easy to paint with a surprising amount of detail, I’m quite pleased with the result. Now that all the undead are done, I think I shall paint one of the heroes before moving on to the evil side again.

heroquest_zombiesI have recently bought Zombicide which frankly comes with loads of zombie miniatures so I wanted to try a quick way of painting them, so for this zombie I tried Army Painters Quickshade dips for the first time, I’m quite impressed with it but it does take a long time to dry and leaves the figure a high gloss unless it’s matt varnished at the end.

Painting Guide

When using Quickshade It’s best to paint all the base coat colours and then apply by brush the Army Painter Dark Tone Quickshade all over the model. This made the model very glossy and it took 16 hours to dry but I expected that.

The zombies Skin was painted with Dead Flesh then shaded, I then highlighted the skin with Dead Flesh again.

I painted the eyes and teeth Desert Yellow, followed by a Umber Wash on just the teeth.

The hair was base coated Cold Grey, shaded with Quickshade, highlighted with Stonewall Grey and then given a Sepia Wash to add a little colour.

The Zombies waistcoat was base coated with Heavy Brown before applying the Quickshade, after drying a Heavy Brown highlight then finally a Heavy Brown and Bleached Bone equal mix for the extreme highlight.

Trousers are base coated with Cold Grey, shaded Quickshade and then a Cold Grey highlight. The belt is Charred Brown, Quickshade, then highlighted with Dark Fleshtone. The buckle is painted with Gunmetal and Umber Wash.

The Zombies cleaver was painted with Gunmetal, Quickshade, then just a Gunmetal highlight on the edges. The handle is Charred Brown, Quickshade then an Earth highlight.

The entire model was finally varnished with Army Painter Anti Shine Matt Varnish, which removed all the gloss from the Quickshade.

Share

Heroquest – Mummies

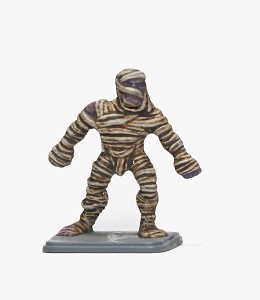
The Mummies are done and they weren’t too hard although the picture doesn’t make them look too good, I’ve already started on the Zombies so the undead element of Heroquest will be done soon.

heroquest_mummieI am still unsure whether to paint the eyes, in real life mummies eyes were removed because of their moisture content but the miniature looks a bit plain without them, so I may add something later.

Painting Guide

The wraps covering the body were simply painted Dead White, followed by an Umber wash, then drybrushed with Dead White again and finally a Sepia Wash.

The skin was started with a Heavy Brown base coat followed by a Dead White drybrush and then a Fleshtone Wash. I wanted the mummy to look a bit strange so used a mix of Purple Ink and Pale Grey Wash and then finally a very light Dead Flesh dry brush to add a bit of colour

The whole model was then coated with Army Painter Anti Shine Matt Varnish. If I do go back and add the eyes it will probably be a dot of Ice Blue
 

Share

Heroquest – Skeletons

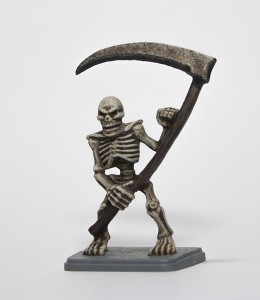
The first of my Heroquest figures are more or less done, they didn’t take long at all as the figures are so basic, waiting for the washes to dry was probably the longest part.

heroquest_skeletonI’m quite pleased with the result for a quick job, I’m still unsure how I’m going to base the figures yet so I have just painted it grey for now, I would like them to match the Heroquest board but as each room is a different colour that’s impossible and I don’t want to cut the figure from the base to attach it to a scenic one so I’ll have to think a bit more about this.

Now I’m going to start work on the Mummies.

I’ve posted a painting guide below so I don’t forget how I did it and hopefully someone will find it useful.

Painting Guide

Unless I say otherwise all my paints are Vallejo Game Color as I like them the best, but there are conversion charts out there if you use another manufacturer.

The Skeletons body I started with a Beasty Brown base coat then dry brushed Bonewhite followed by a Sepia Wash, I then lightly dry brushed a 50/50 mix of Bonewhite and Off White I thought they still looked a little pale so I gave it another wash of watered down Sepia to finish off.

For the weapon the blade was a Tinny Tin base coat then stippled with Gunmetal followed by a Sepia Wash and then a Black Wash. The handle is Charred Brown and then simply highlighted with Earth.

The Base is unfinished at the moment with just coat of Cold Grey. I finished the figures off with a coat of Army Painters Anti Shine Matt Varnish.

Share

Back to the beginning

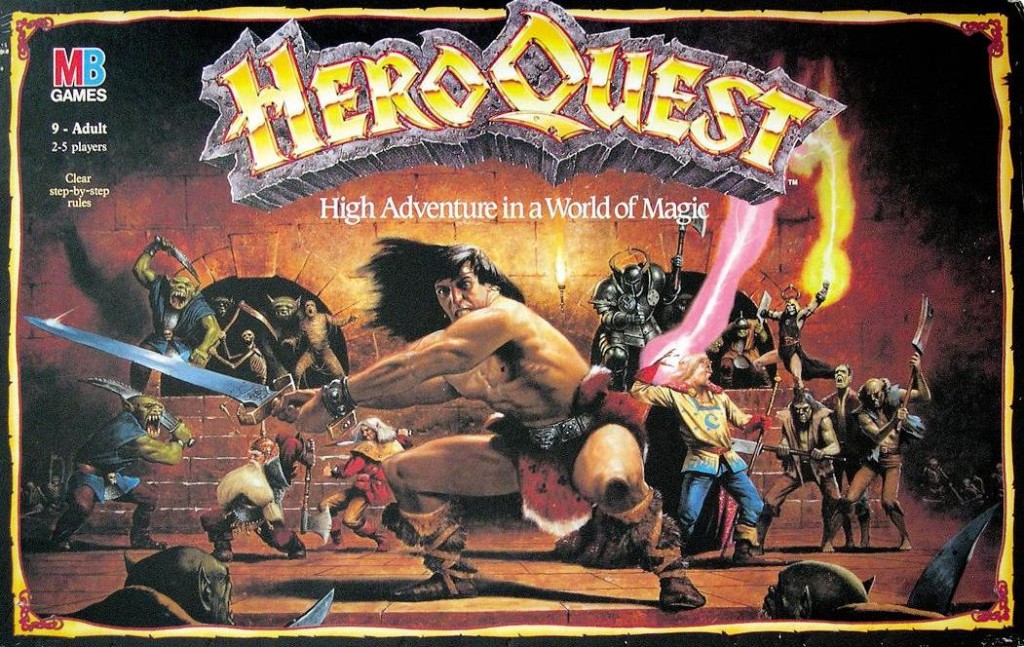
It seems fitting that the first project on the blog is with the game that got me and so many others started in miniature painting over 25 years ago – Heroquest.

Heroquest BoxAlthough I still have the original game I had when I was a kid it’s a bit battered after being in the loft for 20 years or so, it has a few broken broken pieces now mainly the skeletons scythes but there’s a few Orc and Goblin weapons that have broken off. The painting I did as a child is also embarrassing to be honest, just flat colours. So I set out to get myself a new pristine copy from ebay rather than strip and repair everything.

I was fortunate and managed to buy a copy for around £60 which is pretty reasonable when you see what some people pay these days. The game has now arrived and it’s really brought back some fond memories of playing with my dad and brother around the dining room table. The game was in very good condition with nothing painted or broken allowing me to get on and remove mould lines and flash from the figures which I’ve nearly completed with just the Orcs and Goblins left to do.

I’ve decided to start the painting with the skeletons as I know they’ll be the easiest figures in the set to paint so hopefully they shouldn’t take me long.

I’d better make a start!

Share